MOUNTAINS COURSE

The 9 holes of the Mountains course

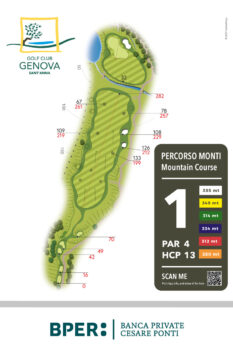
MOUNTAINS COURSE: HOLE 1

Pro tips: Powerful players should be careful that a long tee shot does not end up in the water obstacle; avoid the bunker behind the green, exit from which could prove difficult with certain flag positions.

Par 4 with elevated starting area and wide descending fairway, the mounds on the left conceal the driving range which is indicated as a penalty area where play is prohibited. A small water obstacle crosses the entire hole approximately 50 metres from a wide green, with a bunker behind it.

1_monti

MOUNTAINS COURSE: HOLE 2

Pro tips: Different strategies can be used to tackle this hole. After a good tee shot, a medium-long player will no doubt be tempted to risk the shot to the green, paying attention to the water obstacle that surrounds the target.

Short par 5 with a tee-shot landing area characterised by a grass bunker and a large slope that could carry the ball to the left. The three-tier green is defended by a water obstacle along its entire perimeter.

2_monti

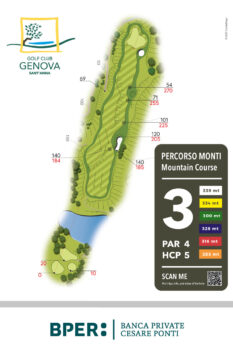
MOUNTAINS COURSE: HOLE 3

Pro tips: Beware of flag positions to the right, beyond the bunker. It is best to play more towards the centre of the green, especially if you are still far away with the first shot, using its natural slope to the right.

Par 4 with a slightly challenging tee shot, out of bounds on the left and a bank going down towards the Mountains hole 2 on the right. A high bank and a bunker to the right of the landing area of the drive could affect medium power players. Wide green, with a bunker defending it on the right.

3_monti

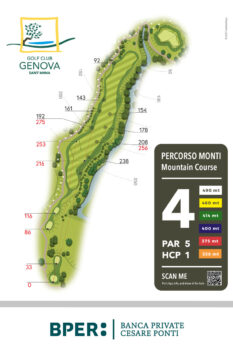
MOUNTAINS COURSE: HOLE 4

Pro tips: the second shot to the green, for more powerful players, or the third for other players, will encounter a natural amphitheatre behind the green that provides protection on shots that are too long and must be exploited, avoiding finishing short and seeing the ball roll towards the water obstacle in front of the green.

Challenging par 5, especially from the back tees, with a tee shot that needs to be long and accurate. A medium-power player will get to the green with three good shots, including a second very precise shot in front of the water obstacle that protects the green.

4_monti

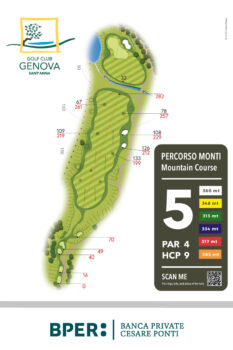
MOUNTAINS COURSE: HOLE 5

Pro tips: on the second shot, especially if not played up close, take advantage of the right bank of the green trying, therefore, not to go right, where the bunker and subsequently the water obstacle are located.

Par 4 with high-up, panoramic starting area. Landing area of the first shot with obstacle on the left and woods on the right, but fairly wide. A moderately flat green welcomes the second shots almost always made, however, with a stance that is not level, defended by a bunker on the left.

5_monti

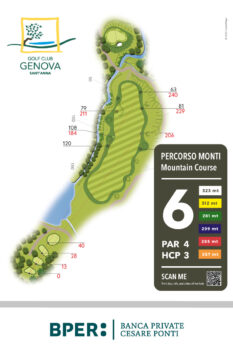
MOUNTAINS COURSE: HOLE 6

Pro tips: for medium-power players, it is advisable to do a lay-up with the second shot before the obstacle and opt for a shot to the green with a more open club.

A par 4 and one of the most complex holes of the course. Dogleg left with a small green defended by a stream. An albeit precise tee shot meets a fairway full of inclines that make the second shot to the green a delicate one, thanks also to the climb and significant distance.

6_monti

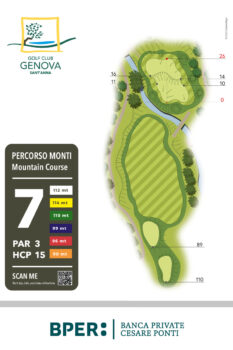
MOUNTAINS COURSE: HOLE 7

Pro tips: Pay close attention to the position of the flag, as with long positions you may need to use up to two more clubs.

Short par 3 characterised by a large green with a high step in the centre, dividing it into two distinct levels.

7_mare

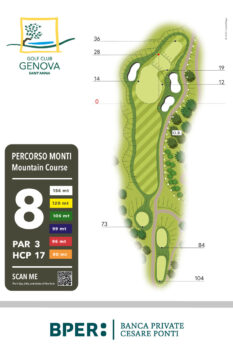
MOUNTAINS COURSE: HOLE 8

Pro tips: with medium-long flag positions, players using a defensive strategy could play one or two fewer irons towards the centre of the short plateau of the green.

Par 3, not long, and aesthetically intriguing. Made interesting and more complex by the flag positions in the centre, under a steep bank, or at the bottom, in this case with a reduced landing green area and defending bunkers in front and behind.

8_monti

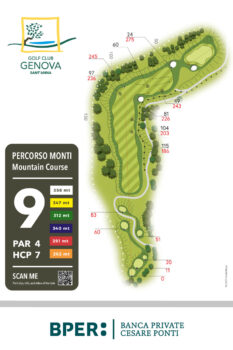
MOUNTAINS COURSE: HOLE 9

Pro tips: for less powerful players it is best to aim the tee shot towards the left side of the fairway. For medium-power players, who are not aiming for the green, it is advisable to have a tee shot to the corner of the dog-leg and not a shot to the right to cut the corner as this would be high risk, without producing any great advantage for the second shot.

Par 4 with 90-degree dogleg, with an even green but almost entirely sloping from left to right. Very powerful players may attempt a drive to the green, but only if they can ensure it is free (by sending a friend ahead to check or using the webcam).

9_monti
Scroll to top